How to Build a Kennel for Vulnerable Pets
Winter is here and there is no ignoring the cold chill in the air. During the nights, the temperature drops even further and our minds drift off thinking of the poor cats and dogs that are outside without adequate shelter.
You can help give them some warmth and security. Building a kennel for a pet in a low-income community is a fun DIY project for the whole family! All you need to change a life and give warmth this winter is a few supplies, handyman tools and a few hours of your time.
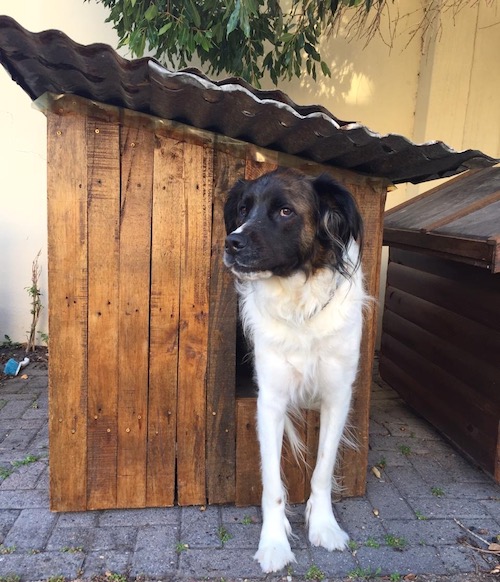
Below you’ll find a step-by-step guide to build a dog kennel out of wooden pallets. It’s a relatively easy project and great for beginners! Completed kennels can be dropped off at TEARS Animal Rescue – 4 Lekkerwater Road, Sunnydale – and will be distributed within the low income communities of Masiphumelele, Ocean View, Vrygrond and Redhill.

What you’ll need
- Wooden pallets (5 to 6 pallets)
- 40mm wood screws (for planking)
- 60mm+ wood screws (for structural support planks)
- Roofing material (corrugated iron type sheet or tarpaulin/thick plastic)
- Sandpaper
- Varnish
Tools required
- Hammer
- Crowbar
- Drill
- Drill bit
- Jigsaw, reciprocating saw or handsaw
- Paint brush (for varnishing)

Step 1 – Create a Base
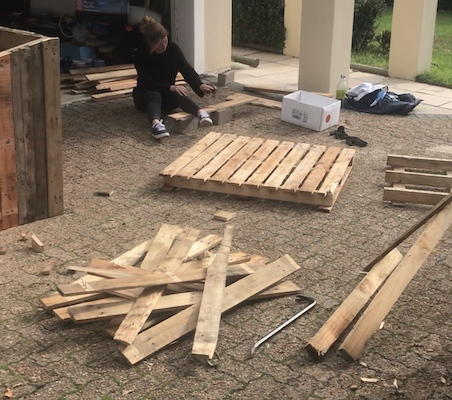
- Find a sturdy pallet for your base
- Decide what size kennel you’d like to make. You can either make a large kennel (with the floor space the full size of your base pallet) or a medium kennel by cutting the pallet in half (make sure that each corner has a support block/plank).
- We recommend medium sized kennels as they are easier to make and transport, and there’s a greater demand for them.

Step 2 – Deconstruct Your Pallets
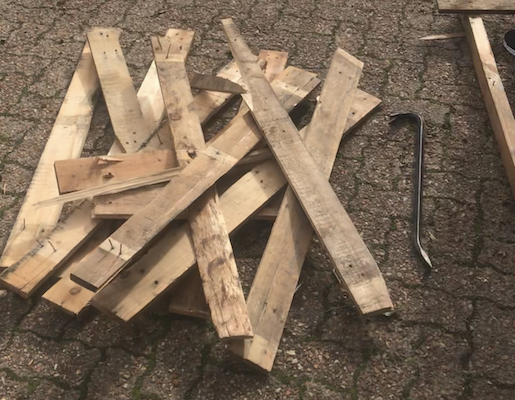
- Using a crowbar, hammer and/or saw, de-plank your remaining pallets
- Pulling the wood apart isn’t difficult, but you need to take care not to destroy too many planks in the process
- The thicker support planks of the pallet will be used to create the structural support of your kennel.

Step 3 – Prepare Your Pallet Wood
- After deconstructing, you’ll want to spend some time preparing the planks for the build phase
- Remove all exposed nails with a claw hammer. If you battle to remove any exposed nails, make sure to hammer them in to avoid potential injury
- Some wood pieces will have become a bit frayed or chipped during deconstruction. Don’t worry, this is normal – pallet wood is cheap wood that tends to chip easily. This is the time to clean up the frays and chips on the surface of the planks. Use rough sandpaper to smooth chips and rough edges. It doesn’t need to look perfect, but you need to make sure that there isn’t anything sharp or jagged that could cause injury.

Step 4 – Build the Side Walls
- Start off with the two longest side walls
- Starting with one side, lay your planks side by side in a vertical position to fit the length of each side of the base pallet

- Once you’re done, it’s time to cut the planks so they are all the same length (this also can be done after Step 6). Keep in mind that pallets come in all shapes and sizes, so we can’t give you exact measurements for what to cut. Instead, measure according to the length of your planks and the height you want your kennel to be, and cut accordingly
- One wall will need to be 10 – 15cm shorter than the other wall, allowing for a slanted roof which will help with rainwater runoff
- As a basic guideline, try keep the length of the planks/height of the kennel between 70cm – 90cm (anything shorter may be too low and uncomfortable and taller kennels are a mission to transport and can also get too cold)
- Use two thicker planks for each side wall to act as your support planks (and to screw the individual planks into to create the wall).

- One support plank will be screwed on top of the pallet base (flush along the length of the base pallet to secure the side wall to the base pallet) and the other will be used along the top of the planks and for securing the roof
- Measure where the bottom support plank will intersect the planks – allow the planks to cover the side of the base pallet.
- Use a drill bit to create pilot holes in the planks – two at the top and two at the bottom (where they intersect the structural support planks). Pilot holes will help make screwing the planks into the support planks a whole lot easier!

- Screw the planks to the support planks to create a sturdy side wall. Make sure the planks are placed tightly together to eliminate any gaps between the planks. Ensure the nicer side of the plank is facing the outside of the kennel.
Step 5 – Erect the Side Walls
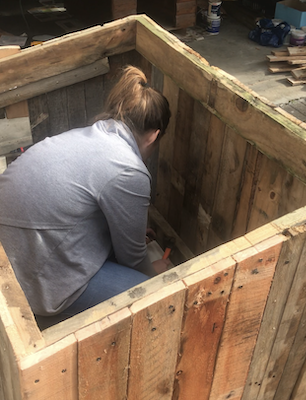
- Place your side walls on your base pallet and screw each side wall to the base pallet. Drill and screw through the support plank and into the support block/plank of the base pallet. Use at least 5 long screws to attach each side wall to the base pallet.

Step 6 – Add Support Planks for the Front and Back Walls
- Use support planks to fix the two side walls together and to use to screw the front and back wall planks into
- Measure and cut support planks to fit along the front and back of the base pallet (ie: between the two side walls). Screw them into the base pallet and to the side wall support planks
- Measure two more support planks to fit between the top of the two side walls. As the walls are different heights, you’ll need to cut angles to make sure the support planks fit snuggly between the two side walls
- Screw the new support planks into the support planks of the side walls. Make sure they are flush with the top of each wall so you can secure the roof into all four top support planks
- With the addition of the new support planks, your kennel structure should now be sturdy.

Step 7 – Create a Solid Floor
- Measure the floor area inside the kennel and cut a solid piece of wood to fit inside the kennel, creating a solid floor. Screw the solid floor into the base pallet
- If you don’t have a solid piece of wood, you can create a solid floor out of pallet planks.

Step 8 – Build the Back Wall
- Plank up the back wall by screwing planks into the support planks
- Cut off the excess wood above the top support plank.
Step 9 – Build the Front Wall with a Doorway
- Add a support plank approximately two-thirds from the base of the pallet. This support plank will serve as an attachment area for the planks above the door
- The doorway needs to be approximately 30cm wide. Add three to four planks to the left of your doorway and screw them into the top and bottom support planks
- Measure and cut planks to fit above and below the doorway. Screw the top planks into the middle and top support planks, and the bottom planks into the bottom support plank and the base pallet
- Cut off any excess wood above the top support plank.

Step 10 – Attach the Roof
- Attach a roof to your kennel. You can either use a piece of corrugated iron roof sheeting, or create your own roof out of pallet planks
- If you’re creating a roof out of pallet planks, be sure to cover it in waterproof material (eg: tarpaulin, thick plastic). Make sure the roofing material is taut and fastened down.
Step 11 – Varnish Your Kennel
Your new kennel will need a good coat of varnish to ensure longevity and prevent the wood from rotting.


